


Could a gate look straight and still scrape the ground or fail to latch? The position and stability of its posts make the difference. If you’re learning how to install a garden gate post, measure the opening and plan the gate clearance before digging. This gives you a reliable starting point and helps avoid correcting a post after the mix has set.
Post spacing, keeping a post upright and estimating postmix can all affect the result. This guide takes you through each stage, from marking out the opening and checking for buried services to setting the posts and checking alignment. For materials planning, allow approximately 1½ bags of 20 kg Rapid Set Postmix Cement per post, or 2 bags for larger or deeper holes. By the end, your posts will be ready for the gate to be hung and tested.
Key Takeaways
- Plan the gate opening and swing direction first, so hinge and latch positions inform where each post goes.
- Learn how to install a garden gate post by preparing the holes, positioning the posts and bracing them before adding postmix.
- Use the postmix guide to prepare enough material, allowing for larger or deeper holes.
- Check spacing, alignment and stability before hanging the gate, then test its movement and adjust the hinges or latch if needed.
How to Plan a Garden Gate Post Installation Before You Dig
Establish the clear opening and decide which way the gate will swing before marking post positions. The gate’s width, hinge and latch placement, and opening direction all affect where the posts need to stand. Marking first and choosing the gate later can leave too little room for it to open or close properly.
Before digging, check the proposed hole locations for buried services. Review the gate’s fitting instructions as well, since they specify the required clearances. There’s no universal gap that suits every gate and fitting.
How should you measure and mark the gate opening?
Measure the clear space between the points where the posts will sit, then compare it with the gate’s stated dimensions and fitting requirements. Allow space for the hinges and latch; don’t assume the gate’s width is the same as the finished opening. Mark the hinge side and latch side clearly, then check the swing path for obstacles such as a wall, fence panel or raised path. This layout check can prevent awkward adjustments later.
- Confirm the gate dimensions and fitting instructions.
- Mark the clear opening and identify hinge and latch sides.
- Check the swing path, then mark the post positions.
Browse the driveway and pedestrian gates and plan the opening around the gate you intend to fit. For background on types of gateposts and their construction, see the general overview. Choose posts and fittings that suit the gate, then confirm their positions against the fitting instructions.
How to Set a Garden Gate Post Securely and Keep It Plumb
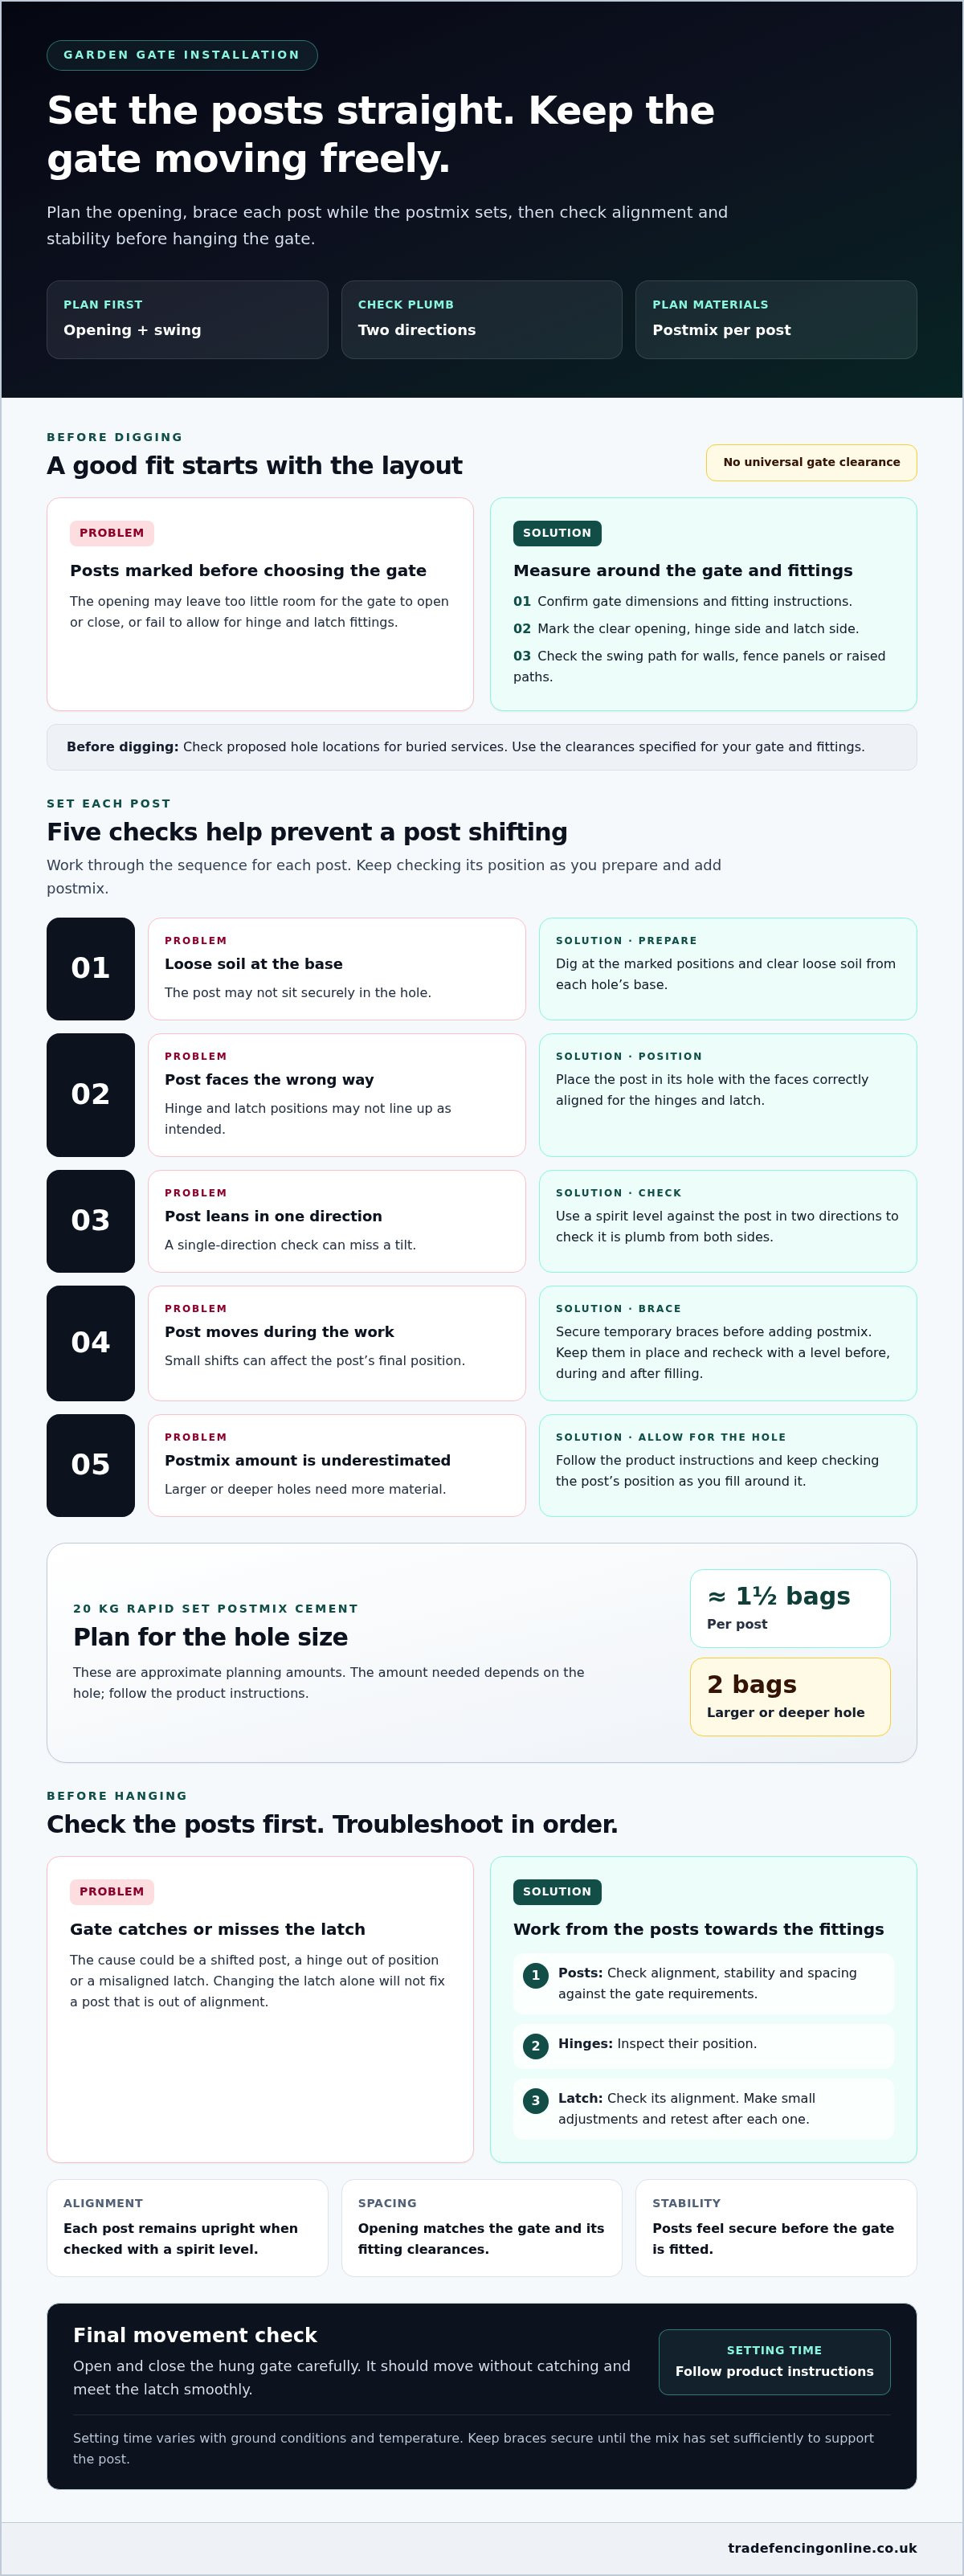
Once the layout is marked, install each post in sequence. A steady brace and repeated level checks help prevent movement while the postmix sets. These steps are central to how to install a garden gate post so it stays upright and ready for the gate.
- Prepare the holes. Dig at the marked positions and clear loose soil from the base so each post can sit securely.
- Position the posts. Place each post in its hole, keeping the faces correctly aligned for the hinges and latch.
- Check alignment. Hold a spirit level against the post, checking in two directions so it’s plumb from both sides.
- Brace the posts. Secure each post with temporary braces to stop it shifting as you work.
- Add postmix. Follow the product instructions and keep checking the post’s position as you fill around it.
Allow for the hole size when preparing materials. The guide for 20 kg Rapid Set Postmix Cement is approximately 1½ bags per post, or 2 bags for a larger or deeper hole. Treat this as a planning guide, since the amount needed depends on the hole.
How do you keep a gate post upright while the postmix sets?
Keep the braces in place and check the post with a spirit level both before and after adding postmix. Recheck it during setting, as small movements can affect the final position. Setting time varies with ground conditions and temperature, so don’t rely on a fixed wait. Follow the product instructions and leave the braces secure until the mix has set sufficiently to support the post.
How to Check the Gate Posts Before Hanging and Finishing
Before hanging the gate, confirm both posts are stable and still aligned. Compare the spacing between them with the gate and its fitting instructions. Check that the posts face the right way for the hinges and latch, and that neither has shifted from its intended position. Use the clearance requirements for your specific gate and fittings rather than relying on a universal measurement.
- Check alignment: Use a spirit level to confirm each post remains upright.
- Check spacing: Compare the opening with the gate and the clearance its fittings require.
- Check stability: Make sure each post feels secure before fitting the gate.
Once hung, open and close the gate carefully. It should move without catching and meet the latch smoothly. If it doesn’t line up, identify the cause before adjusting anything. Check whether a post has moved, a hinge is out of position or the latch is misaligned. Adjust the relevant fitting, keep fixings secure, then test the movement again. If a post is out of alignment, changing the latch alone won’t fix the underlying problem.
What should you do if the gate does not line up?
Work from the posts towards the fittings. First assess post alignment and spacing, then inspect the hinge position and finally the latch. Make small, deliberate adjustments and retest the gate after each one. The aim is smooth movement with secure fixings, not a quick adjustment that leaves a hinge or latch loose. Browse the driveway and pedestrian gates when planning the components for your project.
Get Your Gate Project Ready to Move Forward
Before starting, turn your measurements into a simple materials list. Match the gate and post choice to the opening, then list the fixings and postmix required for the job. A clear list helps you organise the work and avoid pausing midway to source essentials.
Knowing how to install a garden gate post is a practical first step towards a gate that’s ready for everyday use. Keep the gate fitting instructions to hand and work through the installation at a steady pace. For your gate, posts and postmix, shop online from Romford Fencing Ltd. Use code WELCOME10 for 10% off your first order.
Shop now and get your gate project underway.
Frequently Asked Questions
How deep should a garden gate post hole be?
Product guidance recommends burying at least one-third of the post’s total length, with a minimum depth of 2 ft. Consider both the full post length and how much needs to remain above ground before digging. Ground conditions and the gate’s size can also affect the installation plan.
How much postmix do I need for a gate post?
Allow approximately 1½ 20 kg bags per post, or 2 bags for larger or deeper holes. This is a useful starting point for planning materials, but the hole size affects the amount needed. Estimate each hole separately rather than assuming every post needs an identical quantity.
Can I use a fence post as a garden gate post?
Yes, provided the post is suitable for the gate’s weight, dimensions and hinge fixings. A gate moves repeatedly, so the post needs to remain secure under that movement, not simply match the fence line. Check the post material and size against the fittings, and follow the gate manufacturer’s installation guidance before attaching the hinges.
How long does rapid-set postmix take to set?
There isn’t one reliable setting time for every installation. Rapid Set Postmix Cement’s setting time varies with ground conditions and temperature, so follow the product instructions rather than relying on a fixed wait. Keep the post braced while the mix sets, and don’t hang or operate the gate until the post is secure enough for the work to continue.